How do I upload a podcast to iTunes?
It’s a common question but let’s clear something up real quick:
You don’t technically upload a podcast to iTunes (now Apple Podcasts) – but you actually submit your podcast to iTunes.
Here’s the basic process:
- Sign up for a podcast hosting plan (Buzzsprout is our #1 pick)
- Upload your podcast episodes to a podcast hosting platform
- Update podcast settings like cover art, name, and author
- Create an Apple ID and log in to Podcasts Connect
- Submit your podcast RSS feed to iTunes (Apple Podcasts)
We’ll walk you through the process to make it as easy as possible.
1. Sign up for a podcast hosting plan
There are many options for podcast hosting platforms, but our #1 choice is Buzzsprout so we’ll show you the upload process using them as an example.
You should see this image when you use our link to indicate you’ll get a free $20 Amazon gift card after switching from a free plan to a paid plan:

Then you’ll simply click one of the ‘Get Started’ buttons:

Enter your name and email on the next screen, click ‘Create My Podcast’, and you’ll be all set:

2. Upload your podcast episodes to a podcast hosting platform
After you sign up, you’ll need to upload your audio files.
With Buzzsprout you can upload .mp3 or .wav files and they will automatically convert them to the proper format and size.
You will want to choose an episode title, description, summary, and episode number.
Make sure it is published now and not scheduled for a future release.

3. Update podcast settings like cover art, name, and author
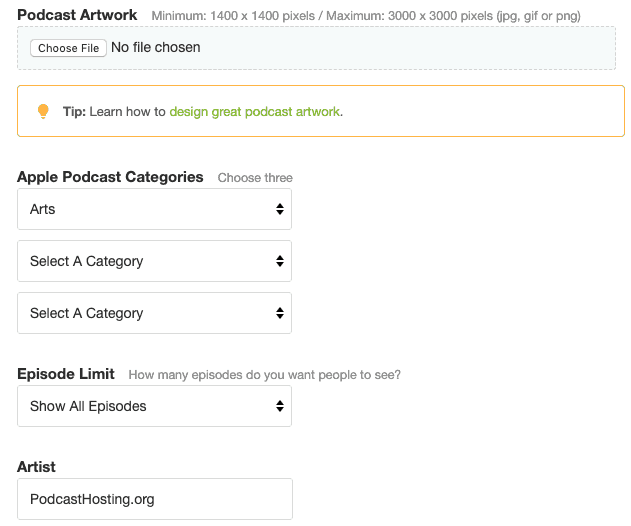
Under the ‘Podcast Settings’ tab, fill out all the fields for your podcast info:

Apple requires you to have:
- Title
- Description
- Artwork
- Category
- Language
- Explicit or Not Explicit
For your cover art, Apple has some specific requirements:
- Size: square; minimum 1400 x 1400 pixels and maximum 3000 x 3000 pixels
- Resolution: 72 dpi
- File type: JPEG or PNG
- Colorspace: RGB
- Show artwork must be original and can’t contain any of the following:
- Blurry, misaligned, mismatched, or pixelated images
- Explicit language
- Placeholder images
- The Apple Inc., Apple Podcasts, or iTunes Store logos
- The terms Apple Inc., Apple Podcasts, Apple Music, iTunes Store, or iTunes
- Visual representation of Apple hardware
- References to illegal drugs, profanity, or violence
I recommend creating a 3,000 x 3,000-pixel image for the best quality.
And remember to save your setting once you’ve filled them all out!
4. Create an Apple ID and log in to Podcasts Connect

Now you’ll need to create an Apple ID.
Even if you already have one, you might want to create one specifically for your podcast to keep things separate.
5. Submit your podcast RSS feed to iTunes (Apple Podcasts)
Now back in your Buzzsprout dashboard, click Directories -> Apple Podcasts.
Under ‘Step 2: Submit your RSS feed to Apple Podcasts’ click the ‘Submit to Apple Podcasts’ button:

Buzzsprout has done some smart programming to make your RSS feed get automatically filled on Apple’s Podcast Connect website.
If for some reason it’s not, you can simply copy and paste it.
Click the Validate button to have Apple to a quick automated check of your feed. Assuming you filled everything out, you’ll get a green light and you can click Submit!

If the validation process fails, Apple provides some helpful guidance on what to fix and you can repeat the validation.
That’s it! Now you’ll just have to wait for approval – which usually doesn’t take more than a day or two.